Published
- 3 min read
How to Enable Multi-Factor Authentication using Microsoft Authenticator
How to Enable Multi-Factor Authentication using Microsoft Authenticator App for Office 365 Accounts
MFA/(2FA) is a security feature that adds an extra layer of protection to your Office 365 account. With MFA, you need to provide both your password and a verification code from your mobile device to sign into your account. This makes it harder for hackers to access your account even if they know your password.
To enable MFA using the Microsoft Authenticator App, you need to download and install the app on your mobile device, set it up as your verification method, and scan a QR code to link it to your account. Here are the steps to do that:
Step 1: Download and install the Microsoft Authenticator App
- Go to the App Store/Play Store on your mobile device and search for Microsoft Authenticator.
- Download and install the app on your device.
- Open the app and accept the terms of use and privacy policy.
Step 2: Set up Microsoft Authenticator App as your verification method
- On your computer, open a browser and go to portal.office.com.
- Sign in to your Office 365 account with your email and password.
- If you see a screen that says, “More information required”, click Next.
- If you see a screen that says, “Set up your account”, click Set it up now.
- If not follow the below link https://aka.ms/mfasetup
- Add sign-in method option in the Security info tab.
- Choose the Authenticator app from the dropdown menu.
- Make sure “Receive notifications for verification” is selected.
- Click Set up.
Step 3: Scan the QR code to link your app to your account


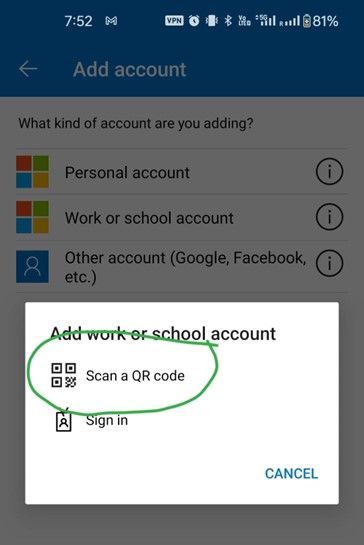
- On your mobile device, open the Microsoft Authenticator app and tap the + icon in the upper-right corner.
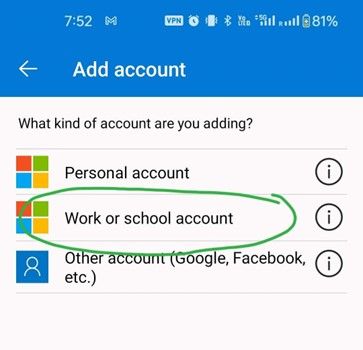
- Tap Work or school account.
- Allow the app to access your camera if prompted.
- Scan the QR code that appears on your computer screen.
- On your computer, click Next.
- The app will send a notification to your mobile device as a test.
- On your mobile device, tap Approve.
- On your computer, you will see a message that says “Your configuration was successful”.
- Click Next.
Step 4: Add your phone number as a backup option

- On your computer, enter your mobile phone number in the box.
- Click Next.
- You will receive a text message with a verification code on your phone.
- Enter the code on your computer and click Verify.
- Click Done.
Conclusion
You have successfully enabled 2FA using the Microsoft Authenticator App for your Office 365 account. From now on, whenever you sign into your account, you will need to enter your password and approve a notification from the app on your mobile device.
I hope this tutorial was helpful. If you have any questions, please feel free to contact me.